Installation Wizard step by step
- Connect trough your freshed installed appliance.
- Click Next on the Welcome message.
1) Simple Network configuration
Server and domain
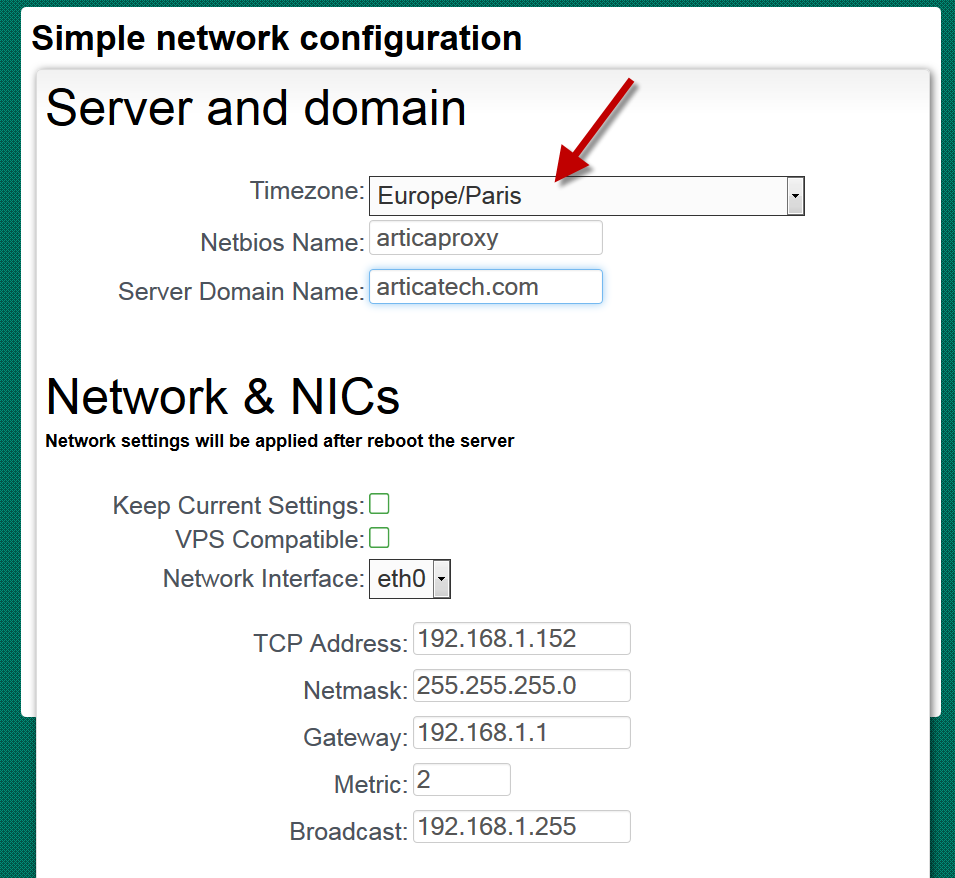
- timezone: Choose the TimeZone for your server. It is an important part in order to correctly connect your server to an Active Directory server or to display statistics.
- Netbios name: Define an hostname (without the domain part) less than 15 characters.
- Server domain name: Set the domain part of your FQDN server.
Network & NICs
- Keep current settings: If checked, Artica will not modify the Network during the wizard installation.
- VPS compatible: If you have installed your server on a VPS, check it.
- Network interface:: Choose the correct Interface that will be used to communicate with the server, for example on a VPS choose the virtual interface like eth0:0
- TCP Address: Define here the main IP address.
- Netmask: Set the netmask of the IP settings
- Gateway: Set the main gateway of your Network settings ( set 0.0.0.0 if you did not want to use gateway)
- Metric: Set the metric ( 1-255)
- Broadcast: Set the broadcast network ( set 0.0.0.0 if you did not want to use broadcast)
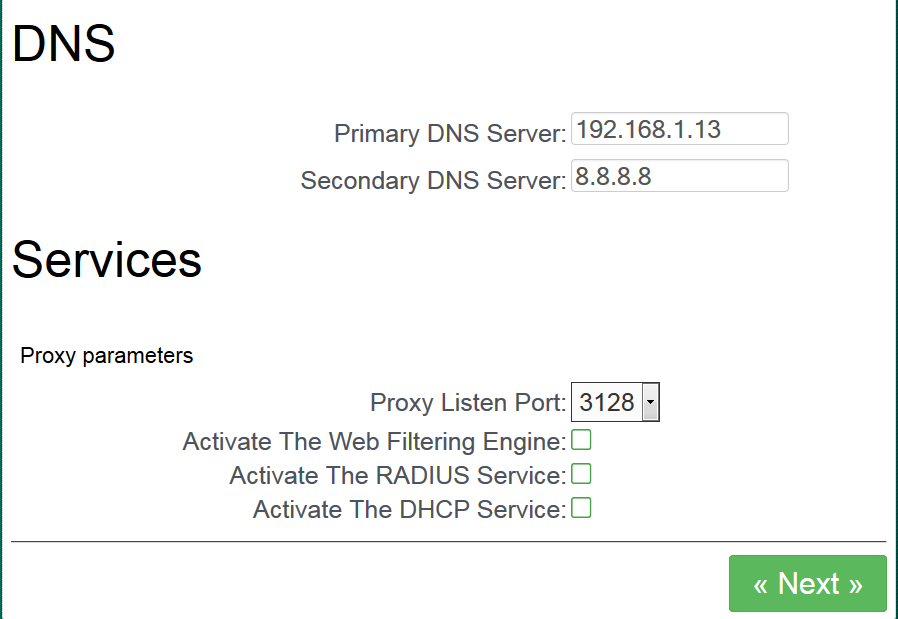
DNS
For a proxy DNS is an important part, be sure to use good DNS servers.
Define the primary and secondary server in order to use the DNS.
Services
Proxy parameters
- Proxy listen port: By default the Proxy will listen on 3128. If you want to change it, set here.
- Activate the Web filtering engine: If you want to use the Web filtering Engine.
- Activate the RADIUS service: If you want to run a Radius service on your server
- Activate the DHCP service: If you want to run a DHCP service on your server
Click Next
2) Join Microsoft Active Directory Domain
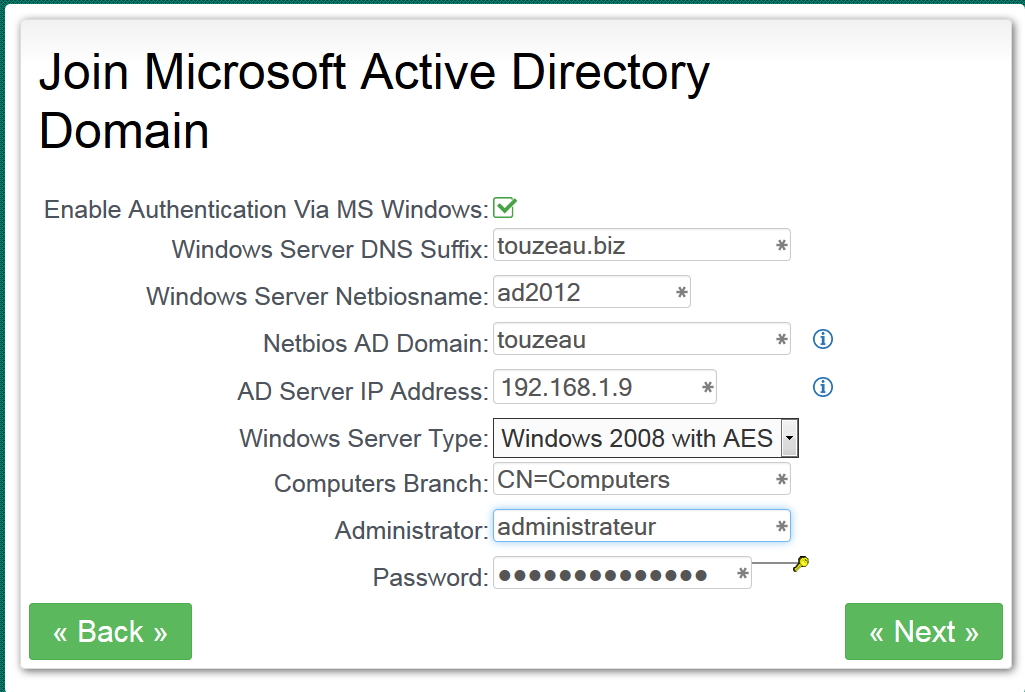
If you plan to use the proxy with the Active Directory of your company, enable the Enable authentication via MS Windows checkbox.
To understand this form, here it is an example.
We want to join our Active Directory with the servername ad2012.touzeau.biz as a 2012 R2 active directory server.
- Windows server DNS suffix: This is the second part of your active directory servername ( in our example touzeau.biz)
- Windows server netbiosname: This is the first part of your active directory servername ( in our example ad2012)
- Netbios AD Domain: This is the “Workgroup” that you can see when browsing the Windows network ( in our example TOUZEAU)
- AD server IP address: The IP address of the Active Directory
- Windows server type: Use 2008 for 2008/2008R2/2012/2012R2
- Computers branch: By default this is the standard branch where the proxy computer will be stored in the AD
- Administrator: username allowed to join a computer to the domain
- Password: Password of the account used to join to the domain.
Contact and organization
Your real company
- Company name: Set here the name of your company. Be careful of this field, you will see this company name everywhere in the Artica Web interface and you will not be able to change it. So if you set ( test, me, home… and other bad information… Bad guy for the future).
- Company website: Set here the company website, it will be used to verify if your company website is correctly categorized.
- Country: Your Country
- City: Your City
- your email address: Your eMail address ( used for license requests )
- Phone: Your Phone ( not mandatory )
- Employees number: Employees number
Virtual company
- Organization: If you did not use Active Directory, this organization will be added as the first organization in the local LDAP server
- Domain name: Used to create the main LDAP branch on the local LDAP server
Click Next
End-Users WebAccess
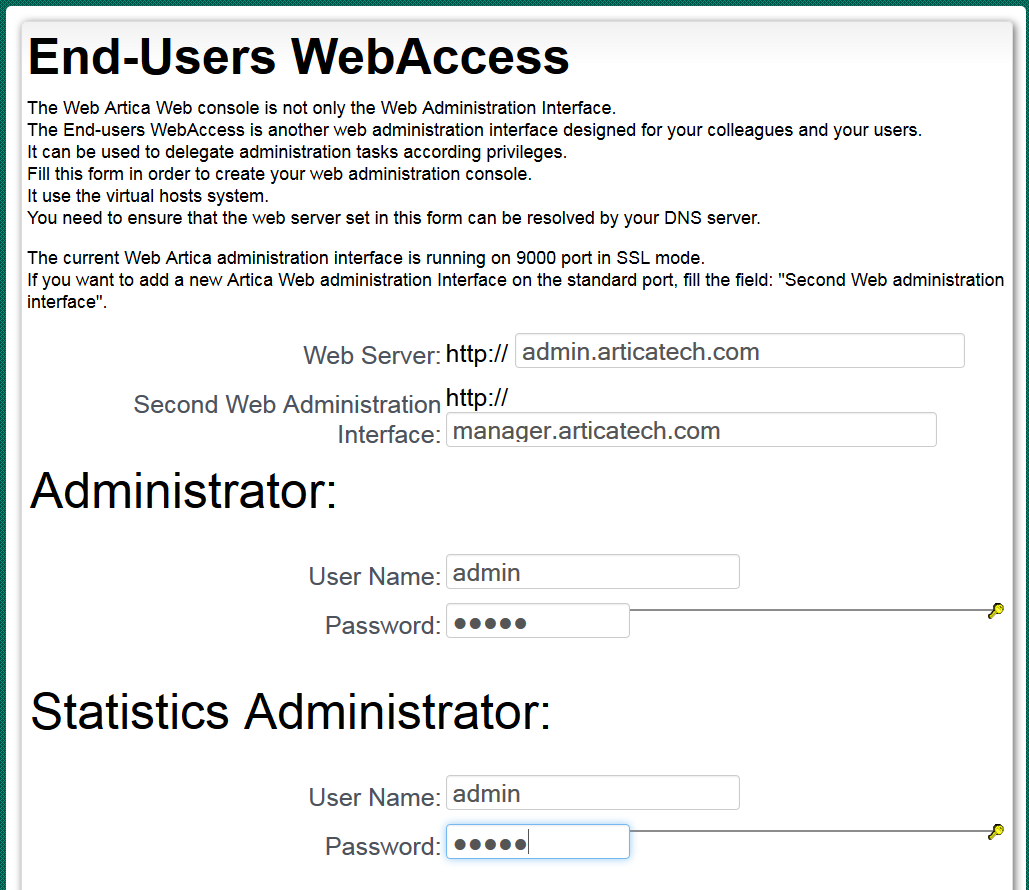
End-Users WebAccess is not the Artica Web Administration console but a second web console for your users
It is not mandatory to fill this form…
The Web Artica Web console is not only the Web Administration Interface.
The End-users WebAccess is another web administration interface designed for your colleagues and your users.
It can be used to delegate administration tasks according privileges.
Fill this form in order to create your web administration console.
It use the virtual hosts system.
You need to ensure that the web server set in this form can be resolved by your DNS server.
The current Web Artica administration interface is running on 9000 port in SSL mode.
If you want to add a new Artica Web administration Interface on the standard port, fill the field: “Second Web administration interface”.
Click on Build parameters in order to let Artica build your settings.

Use Manager and password secret in order to use the Artica Web interface