On Windows systems, SSL certificates are packaged in a Public-Key Cryptography Standards (PKCS) archive file with extension .pfx.
You need to export the .pfx file and convert the contents to the Artica compatible format.
Open a Command Prompt window.
- Type mmc and press the ENTER key.
- On the File menu, click Add/Remove Snap In.
- Click Add.
- In the Add Standalone Snap-in dialog box, select Certificates.
- Click Add.
- In the Certificates snap-in dialog box, select Computer account
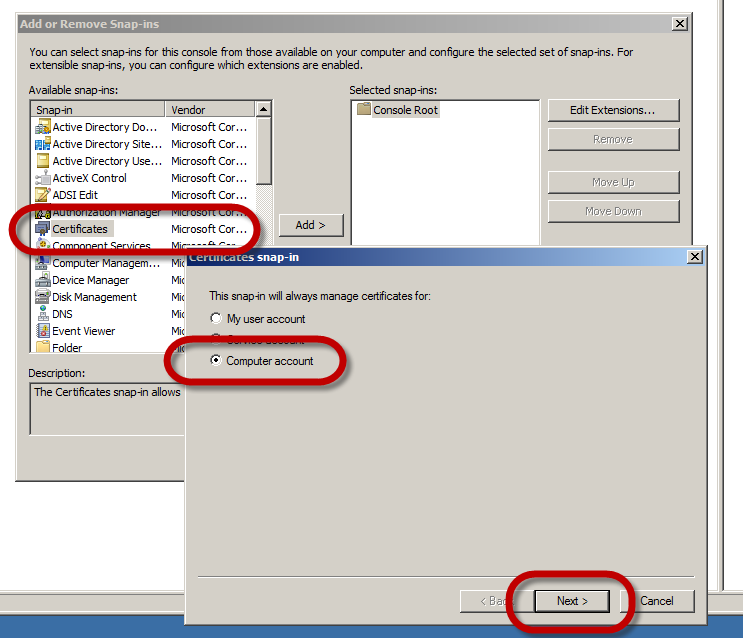
- In the navigation pane (directory tree), click the Certificates folder (Personal > Certificates) in the logical store
- Select your computer certificate and do the right-click All Tasks, Export..

- In the Certificate Export Wizard window that pops up, click Yes, export the private key !important.
This option appears only if the private key is marked as exportable and you have access to it.
If you cannot export the private key, please refer to the “Cannot export the private key from my Windows server” article. - If prompted for a password (used to encrypt the private key before export), type it in the Password and Confirm fields.
Remember the password, as you need to provide it when importing the certificate to Artica. - Click Next.
- In File name field, type the filename and path to the location for storing the exported certificate and private key.
- Click Next, then Finish.
On Artica
- Go to the Certificate Center.
- Create a new certificate and choose “Upload Your Certificate“
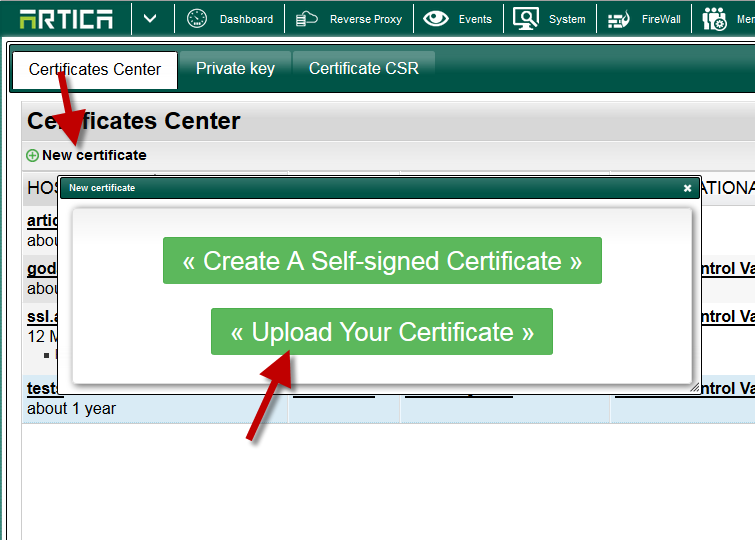
- Set your certificate name and click on Create button.

- Click on the empty created certificate
- Select Tools tab.
- Click on Import a PFX container.
- Set the password used for export the pfx file.
- Upload the pfx file using the button “import“
