MikroTik router has been successfully tested with Artica v2.39.080400 or above
In this Article, we will describe how to build MikroTik rules in order to forward HTTP/HTTPS traffic to the proxy.
Architecture – example:
Our MikroTik manage 4 main networks each network have it’s own Interface

- LAN 1: 192.168.1.0/24
- LAN 2: 192.168.200.0/24
- Ether 3: Dedicated lan where the proxy is.
- WAN : 192.168.20.0 where the final router is.
1) MikroTik rules:
We want the LAN 1 and the LAN2 to be redirected to the proxy when requests try to reach external 80/443 ports.
To perform this, we have to a rule that “tag” packets according to the 80/443 destination ports.
this “tagging” rule will serve a specific route that will be designed to forward packets to the proxy.
The proxy act as gateway and is able to catch TCP packets before requesting Internet.
A) Mark packets:
Choose IP/Firewall on MikroTik
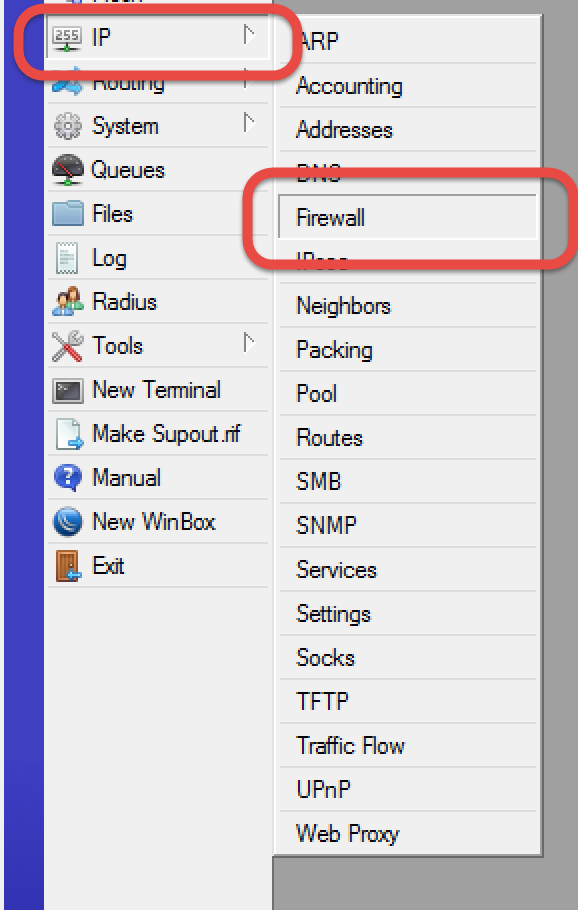
- Click on “Mangle” tab
- Add a new mangle route.
- Chain: prerouting
- protocol: TCP
- DST Port: 80
- In Interface: !Important in order to prevent looping, when the proxy try to reach Internet, packet must be not marked.
Enable the checkbox and select the Interface designed for the proxy.
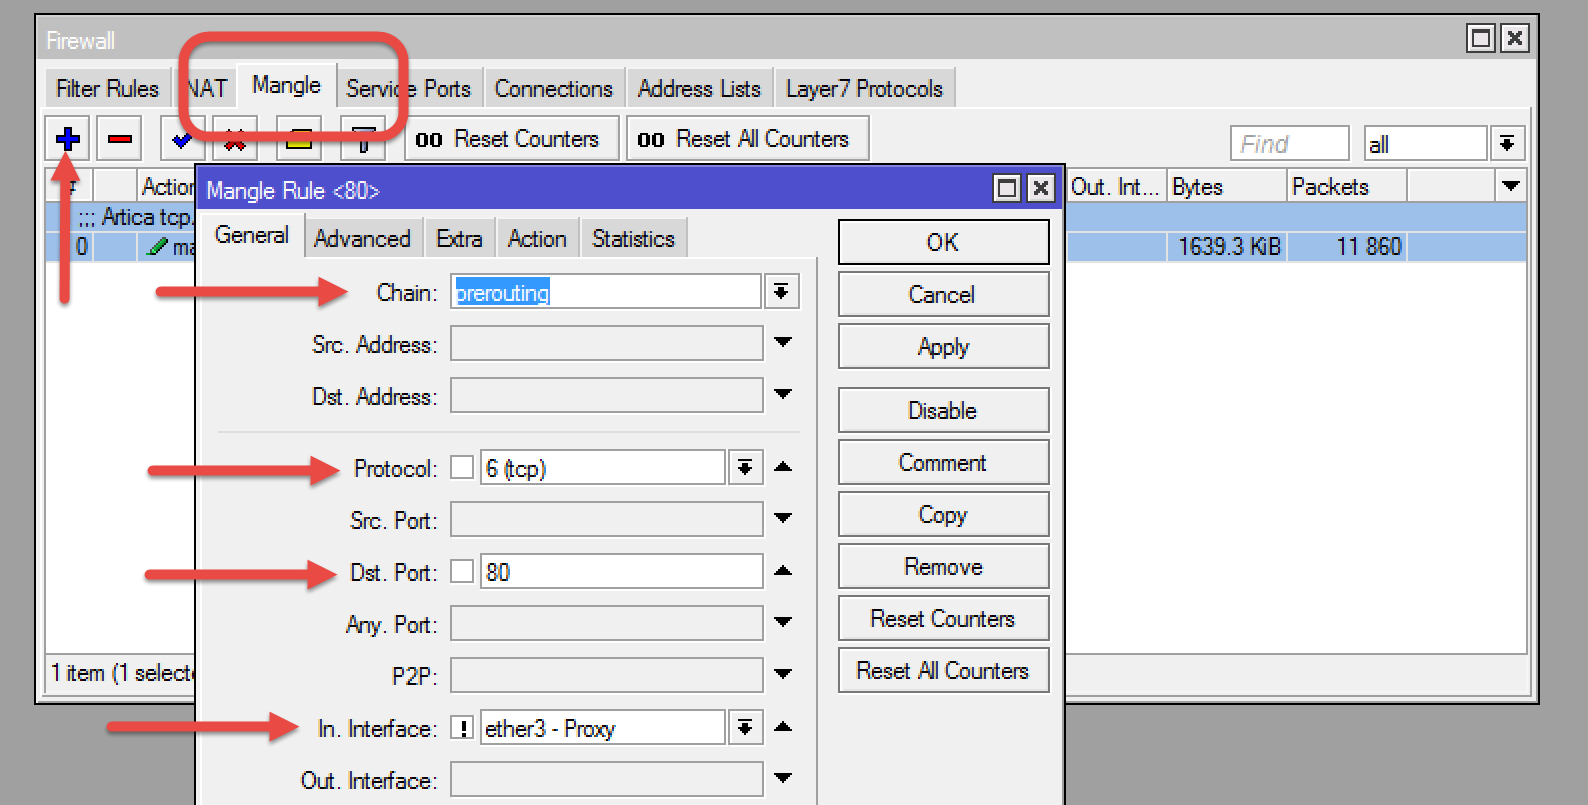
- If you want to forward SSL to the proxy, use 80,443 in Dst Port field

- Click on Action tab
- On the Action list, choose “Mark routing“
- Set the Tag in the “New Routing Mark” field ( we call it “artica” )

This mangle rule is just designed to mark packets that came from all interfaces except the Interface where the proxy is located.
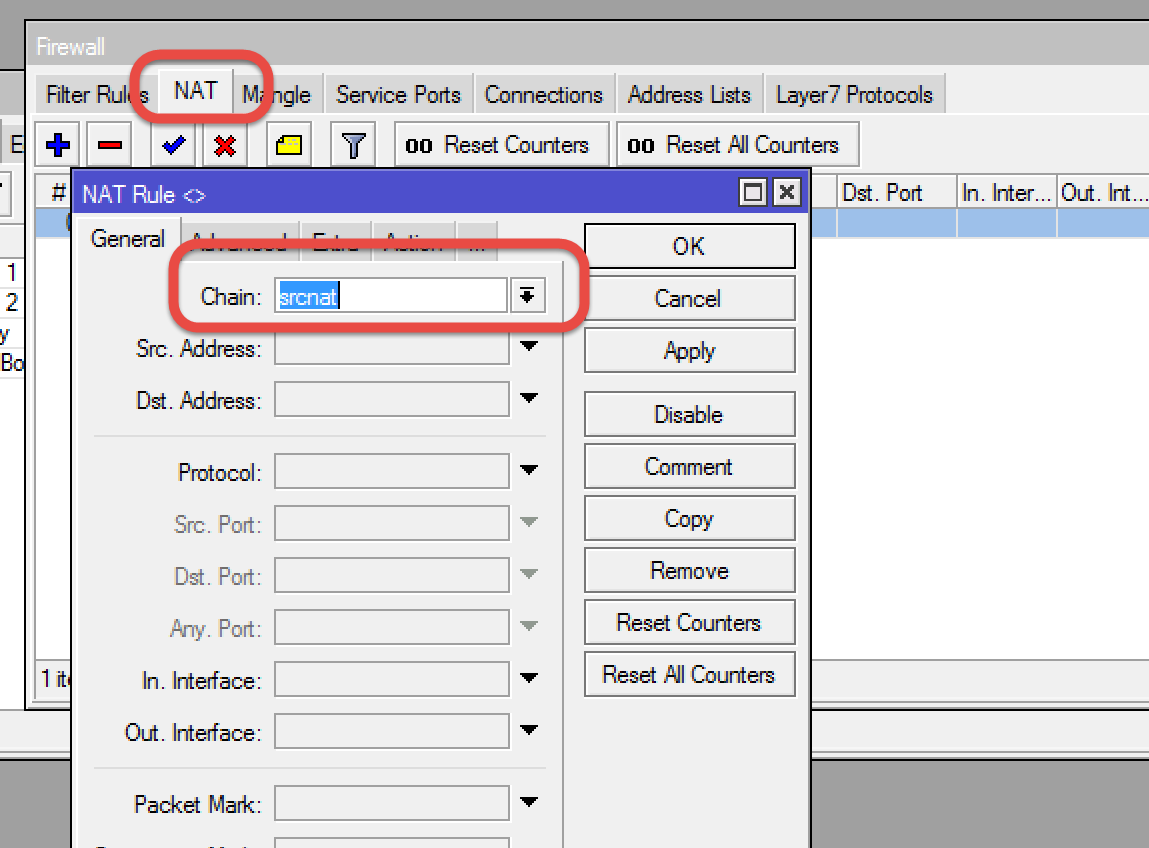
C) Masquerade rule:
- Select NAT tab.
- Add a new rule.
- On General, in Chain, select srcnat
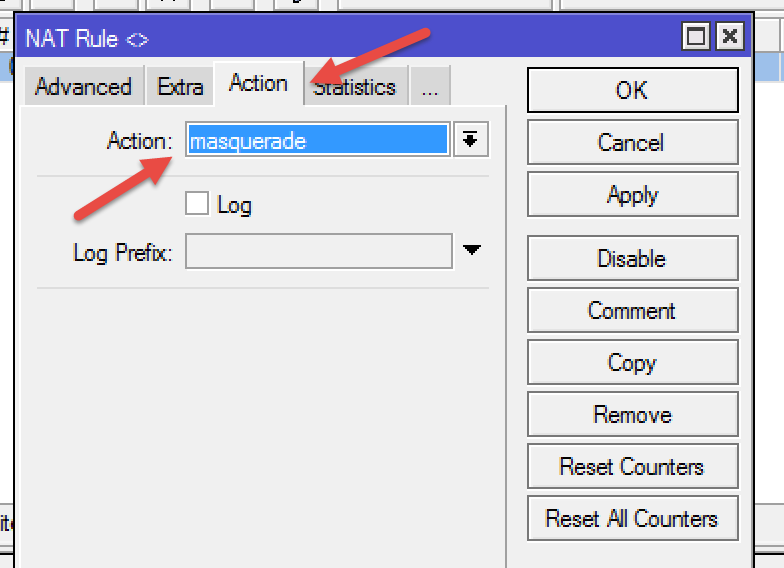
- In Action tab, in Action field, choose “masquerade“
D) Forward packets
- Choose IP/routes on the MikroTik

- Create a new route
- Dst Address: 0.0.0.0/0
- Gateway: the Proxy box IP address.
- Check Gateway: “ping”
- Routing Mark: the tag created in the Mangle rule ( in our case, “artica” )

The routing is able to change the next hope gateway ( the proxy) according tags added by the mangle rule.
Now, each request to Internet on port 80 or 443 will be forwarded to the proxy
2) Make Artica compliance with MikroTik rules.
- Open the Artica Web Console and navigate to “Your Proxy/Listen ports“

- Click on New port
- Select other ports button.

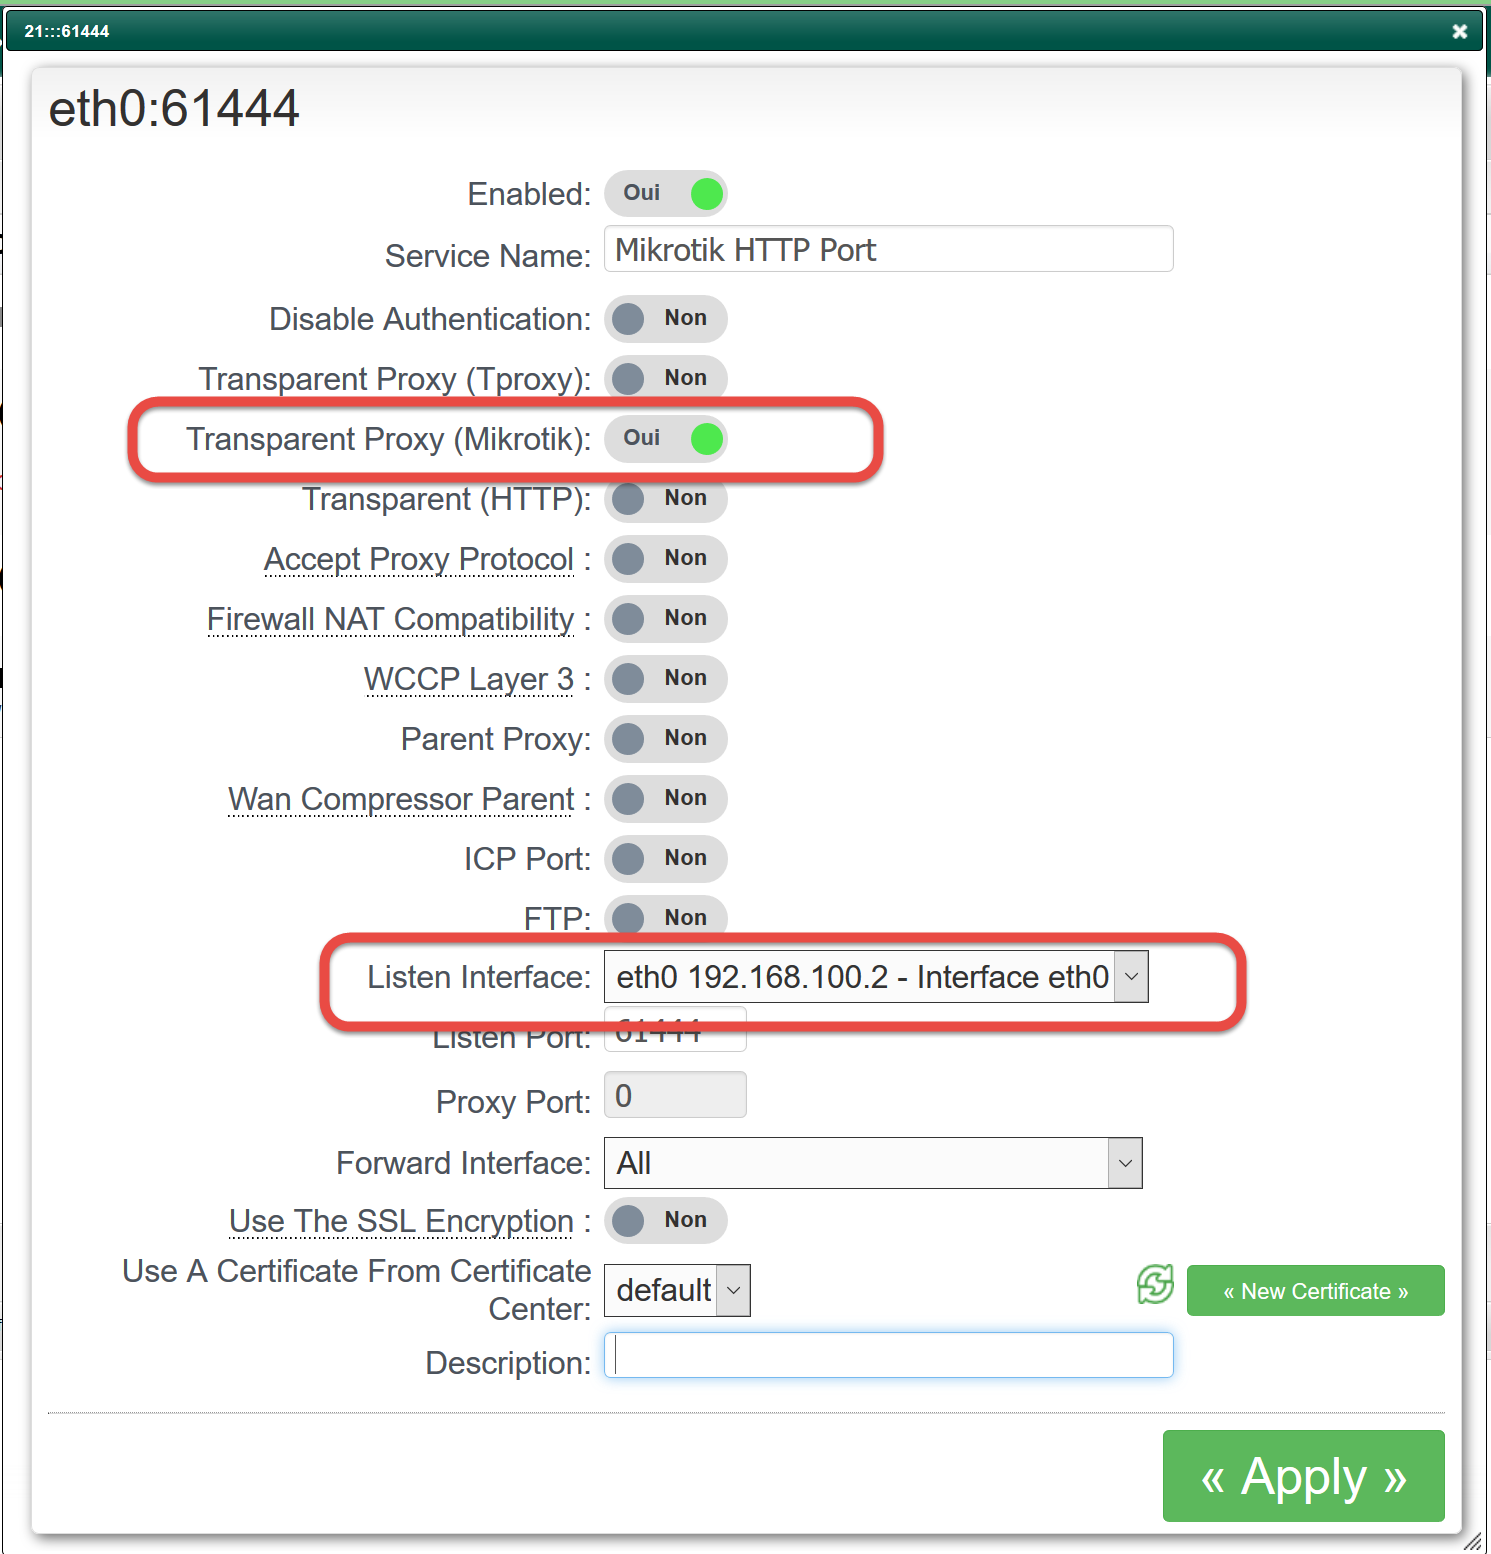
- Turn ON the Transparent Proxy ( MikroTik ) option.
- Choose the correct network interface
- Click on Add button.
- The listen port is not important because it is used internally by the proxy.
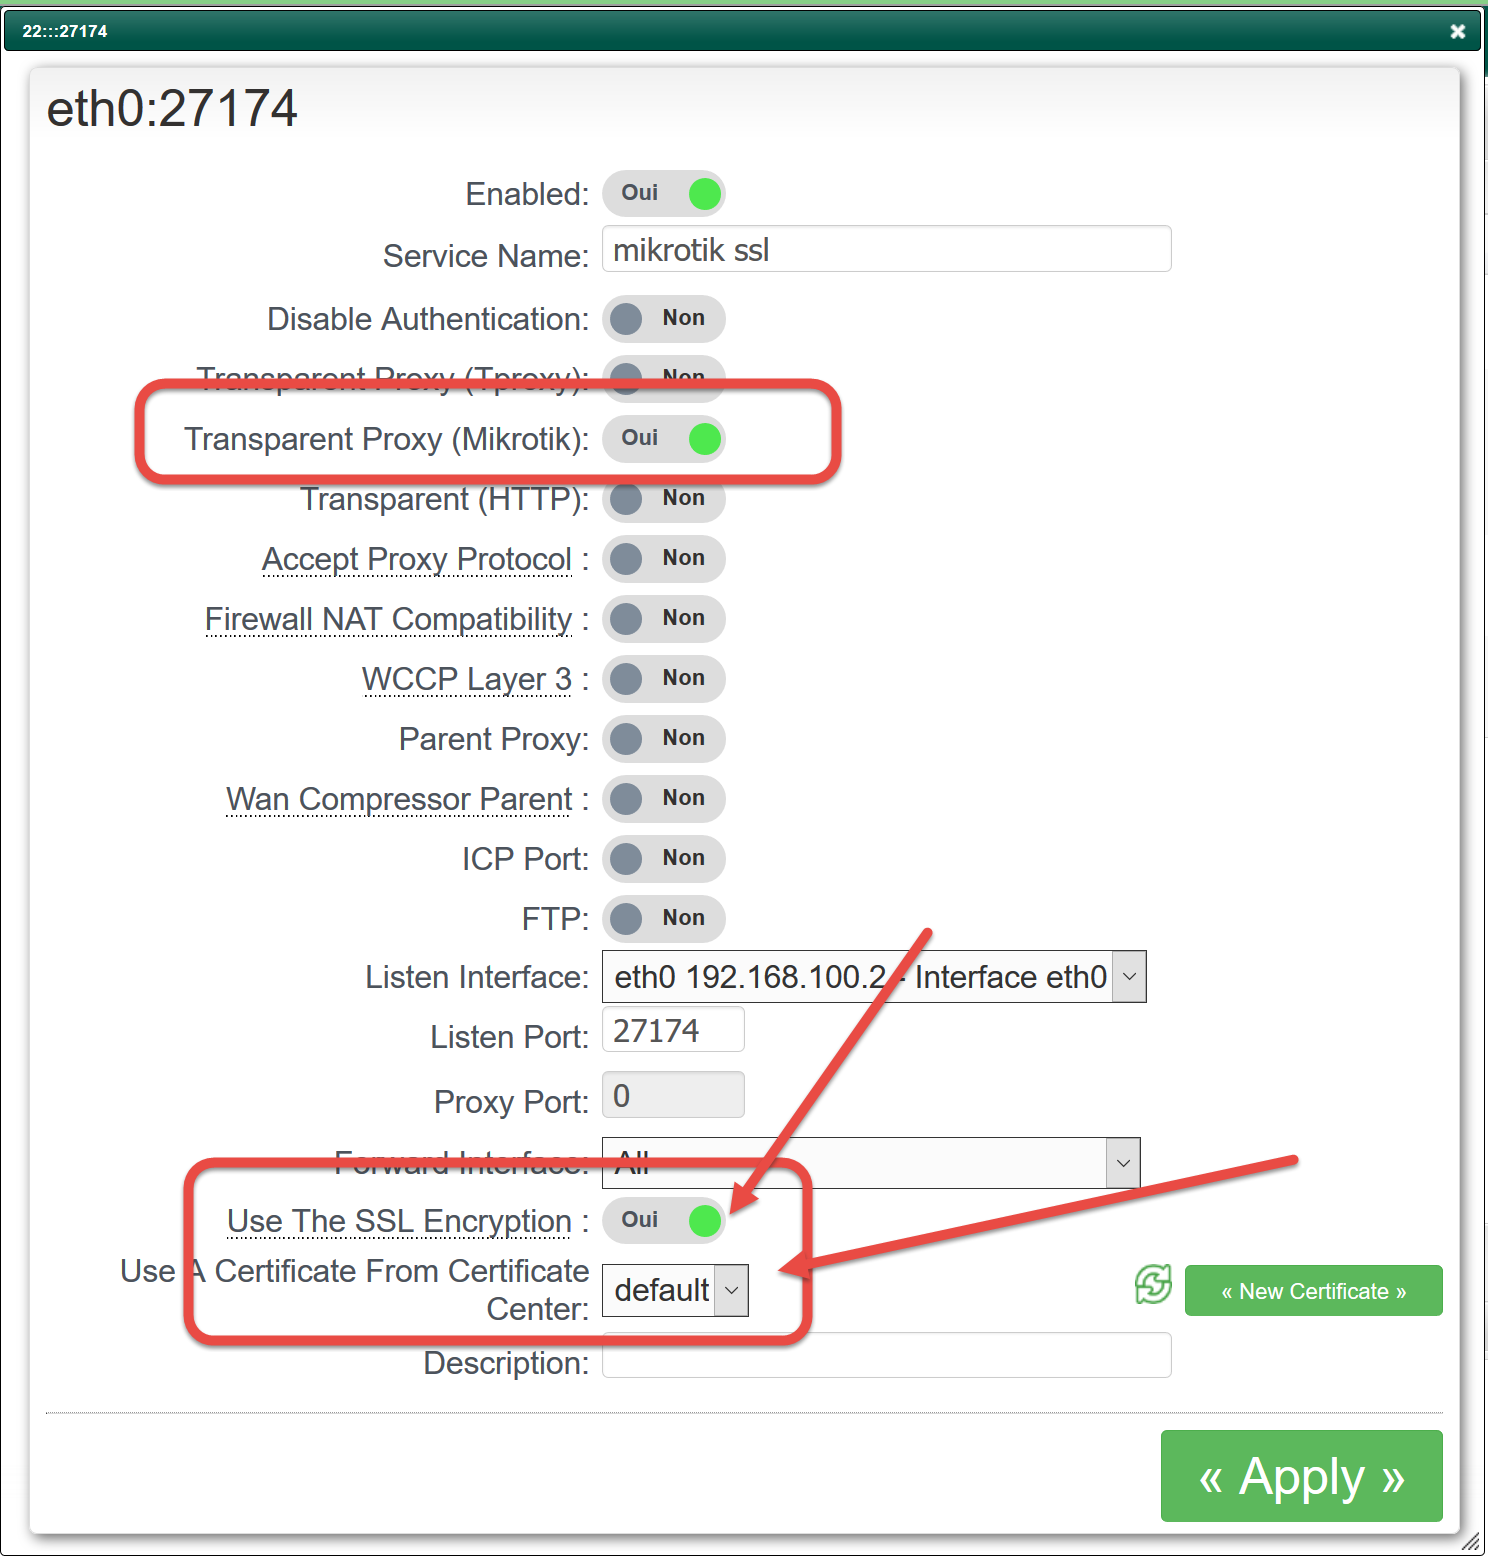
- If you have forwarded HTTPs requests from the MikroTik to the proxy, create a new port with MikroTik option enabled
- Enable the Use the SSL encryption option and choose the certificate in the drop-down list
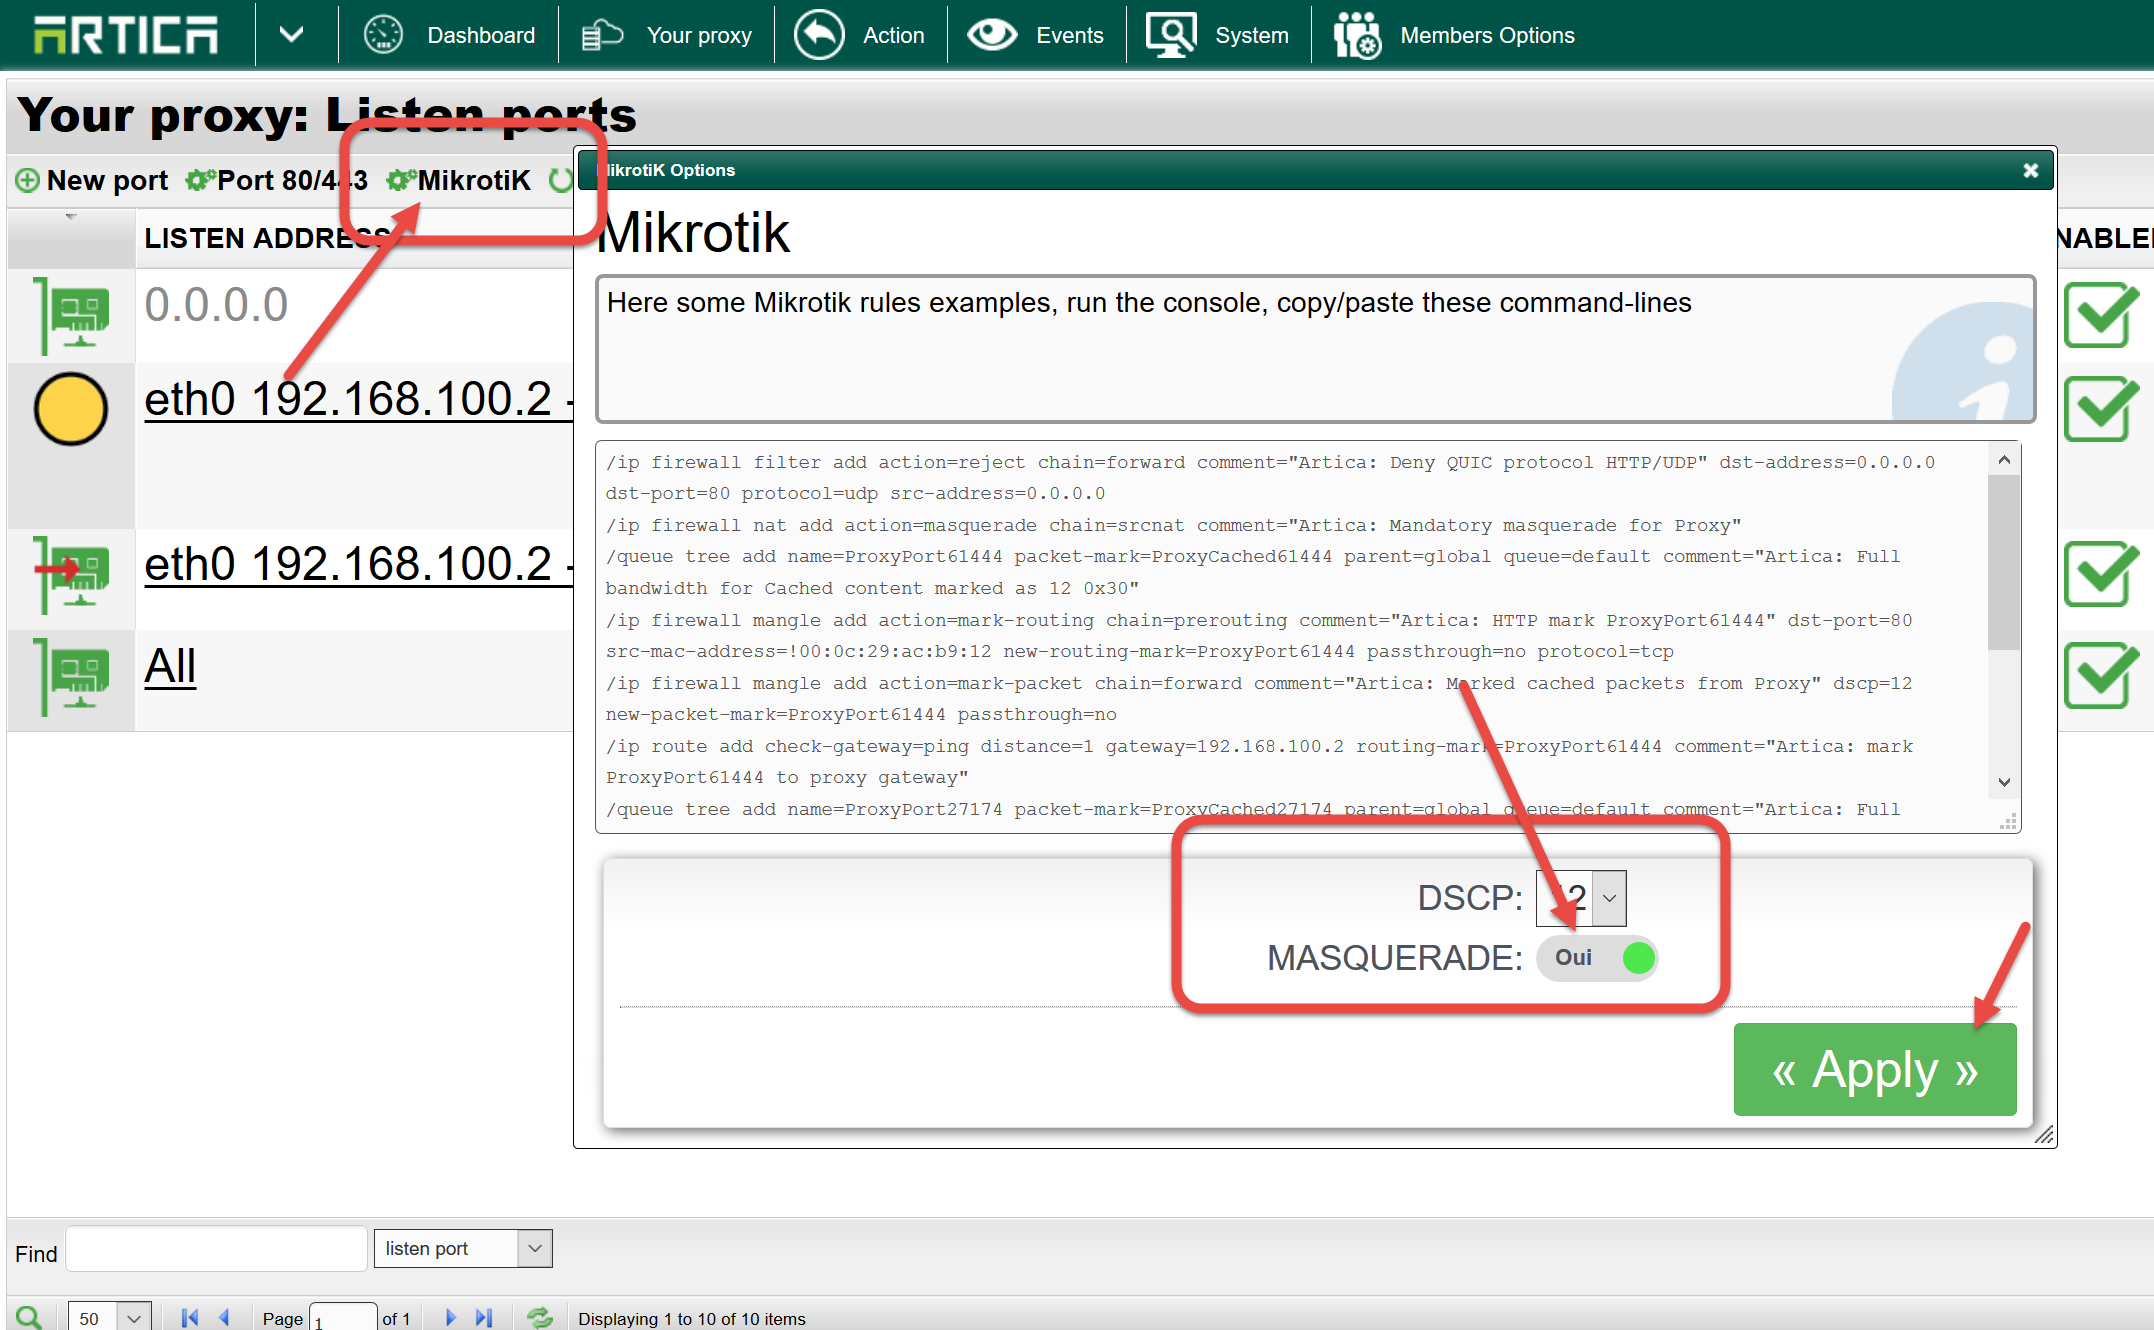
- Click on the MikroTik option on the top menu table
- Turn on the MASQUERADE option
- Click on Apply
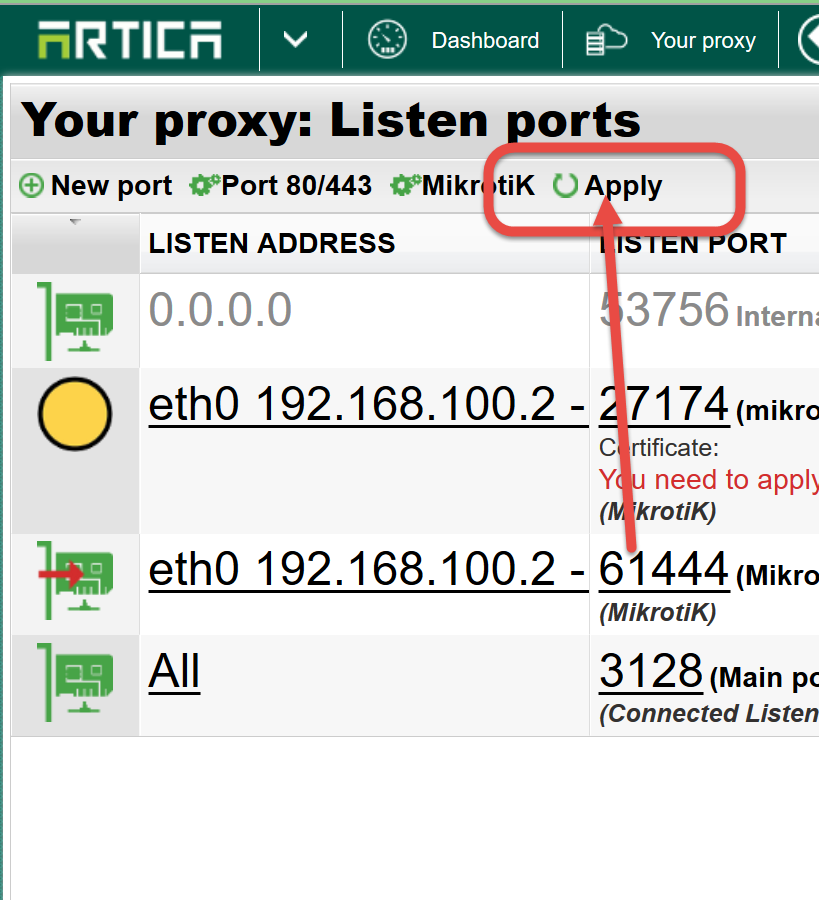
- Finally, click on Apply button on the table top menu in order to make ports in production mode.
Note: Artica install a script that able to reconfigure the system according MikroTik rules.
You can perform theses operations:
-
/etc/init.d/MikroTik restart
-
/etc/init.d/MikroTik start
-
/etc/init.d/MikroTik stop