Session tracking is a set of ACLs object that create sessions.
Sessions can be time limited and can renew using other ACLs.
This method allows you to create a kind of splash screen aka IT Charters and force user to return back after a period.
Procedure using a minimal of 3 tasks :
- Define the session tracking object.
- Create the ACL rule and Define the LOGIN object
- Define the ACTIVE object
Define the session tracking object.
- Go to Your Proxy
- Choose Sessions tracking objects link
- Click on new object
- Define your session object name.
- Choose the identifier ( IP address, login username, MAC address or Statistics group )
- Set in seconds the maximal time of a session.
- Click on Add button.
Create the ACL
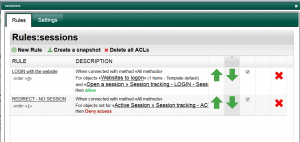
The sequence, LOGIN, ACTIVE, LOGOUT is a set of 3 rules. For better reading, we will use the “ACL group” in order to group these 2 or 3 acls inside one ACL rule group.
Create a group of ACLs
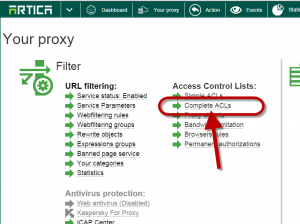
- On your proxy, choose Complete ACL
- Click on new group on the main table and set a name.
Create the LOGIN acl
- Inside this group, we will create first the method for the user to create the session.
- Open the ACL group and create a new ACL that will allow access
- On the objects tab, you have to create first the object that will enable the session.
It should be anything but to make sense it should be a domain or a url regex.
For example, we can imagine that establishing a session to the website : itcharter-logon.company.tld will create the session.
In other way you can create a website called itcharter.company.tld and create a button that redirect access to https://itcharter.company.tld?session=yes, the regex itcharter.company.tld\?session=yes can be used in this method.
- Click on New proxy object in order to create the LOGIN session.
In the drop-down list, choose the created session tracking object with the LOGIN tag and save it - The first ACL is added, it allow users to establish a session to the target item and create the session time.
Create the SESSION/ACTIVE tracking ACL.
The session tracking will deny access if the session is not generated or expired.
We will use a specific deny method.
Instead generating a web error page, we force redirecting access to a remote web page.
This remote web page will be able to display our IT Charter content with a button that redirect browsers to our defined item/uri/Webserver that establish a LOGIN session.
- Create a new ACL rule that deny access.
- On objects, choose the ACTIVE session tracking object
Set the redirect to the splash screen.
- Click on “Choose Template” link
- Click on New Template.
 Give the Template name and subject.
- Enable the Use a Link checkbox.
- Choose 302 as HTTP status code drop-down list.
- Set the url to your splah page in the url field.
- Your new template is added in the list.
- Select it in order to affect this template to the SESSION object.
- To finish, turn on the reverse checkbox on the SESSION object in order to say not.
Verify the order
- Order is important :First we need to allow access to the url/item that establish the session, second we deny users that did not have a session and redirect them to the dedicated page.
The dedicate page must have a button that’s redirect to the url/item in order to establish the session.
More tweaks.
- You can restrict session tracking by adding an object based on IP address of Active Directory group in the deny rule
- If you using 2 URLs, first to establish a session, and second your splash screen, you need to allow access to the splash screen ( a rule located on the top.)
- The redirect in SSL mode did not working, you can improve your ACLs by adding the HTTP protocol only or to say “NOT protocol connect” in the deny rule.


