This article describes how to setup WCCP on the FortiGate to intercept and redirect HTTP traffic (TCP port 80) to Artica Proxy.
- Client traffic going through the FortiGate is intercepted and redirected to Artica.
- Artica gets the content if required and services the client by sending the content back to the FortiGate.
- The FortiGate retransmitted the content from Artica to the client.
- WCCP protocol uses UDP port 2048 to communicate between FortiGate and Caches
- WCCP has 2 types of services (well-known service id=0 for http and dynamic services (from id 51 to 255)
- We assume the proxy using the 10.102.0.83 ip address and LAN is on 10.100.0.0 and use the Forigate Interface port1 10.120.0.225
- The fortigate use the network
FortiGate Configuration
 config system interface
 edit "port1"
 set vdom "root"
 set ip 10.120.0.225 255.255.254.0
 set allowaccess ping https ssh http telnet
 set type physical
 set wccp enable (#1)
 next
 edit "internal"
 set vdom "root"
 set ip 10.100.0.225 255.255.254.0
 set allowaccess ping https ssh http telnet
 set type physical
 next
 edit "external"
 set vdom "root"
 set ip 192.168.182.225 255.255.254.0
 set allowaccess ping https ssh http telnet
 set type physical
 next
 end
config firewall address
 edit "all"
 next
 edit "artica-proxy"
 set associated-interface "port1"
 set subnet 10.102.0.83 255.255.255.255
 next
 edit "client-subnet"
 set associated-interface "internal"
 set subnet 10.100.0.0 255.255.255.0
 next
 end
 config firewall policy
 edit 3
 set srcintf "internal"
 set dstintf "external"
 set srcaddr "client-subnet"
 set dstaddr "all"
 set action accept
 set schedule "always"
 set service "HTTP"
 set wccp enable (#2)
 set comments "HTTP TRAFFIC TO Artica-proxy"
 set nat enable
 next
 edit 1
 set srcintf "internal"
 set dstintf "external"
 set srcaddr "all"
 set dstaddr "all"
 set action accept
 set schedule "always"
 set service "DNS" "PING"
 set comments "CLIENT NON HTTP TRAFFIC DIRECT"
 set nat enable
 next
 edit 2
 set srcintf "port1"
 set dstintf "external"
 set srcaddr "squid-proxy"
 set dstaddr "all"
 set action accept
 set schedule "always"
 set service "DNS" "HTTP" "PING"
 set comments "Artica-Proxy TRAFFIC"
 set nat enable
 next
 end
 config router static
 edit 1
 set device "external"
 set gateway 192.168.183.254
 next
 edit 2
 set device "port1"
 set dst 10.102.0.0 255.255.254.0
 set gateway 10.120.0.76
 next
 end
config system wccp
 edit "0" (#3)
 set router-id 10.120.0.225 (#4)
 set server-list 10.102.0.83 255.255.255.255 (#5)
 set authentication enable (#6)
 next
 end
Artica configuration
- You must use Artica version 2.09.061800 or later.
- On the top menu, choose “Your Proxy“
- Select “Listen ports” item.
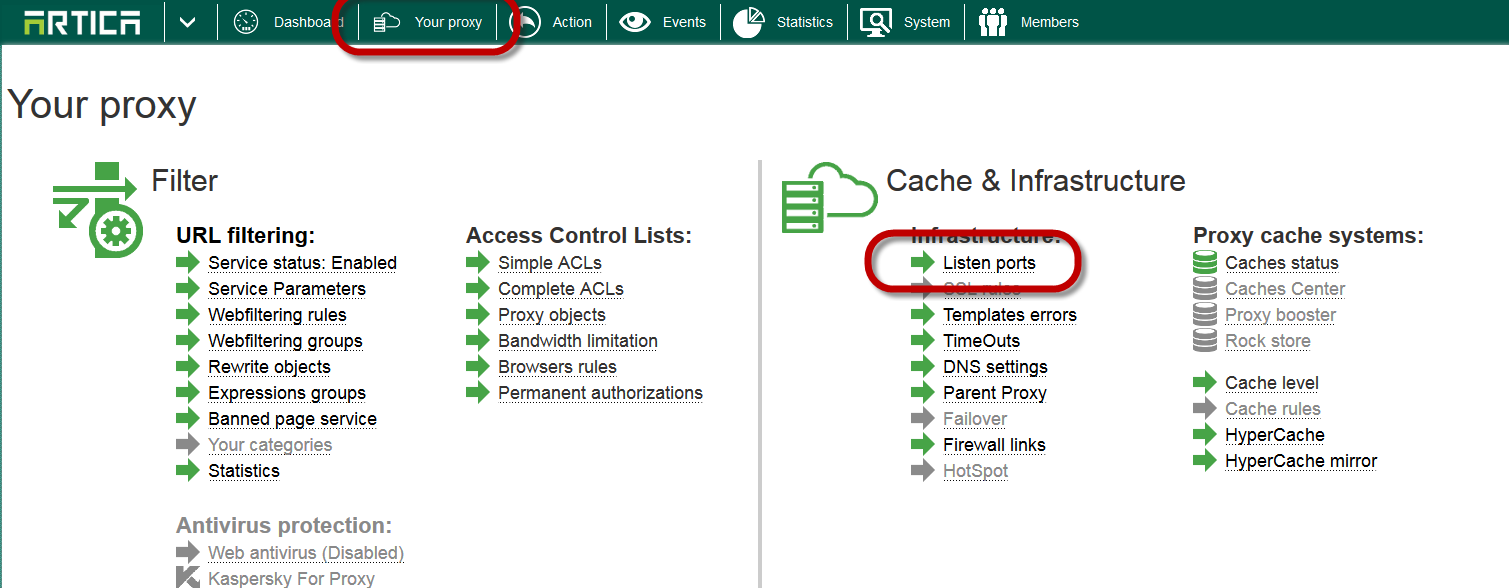
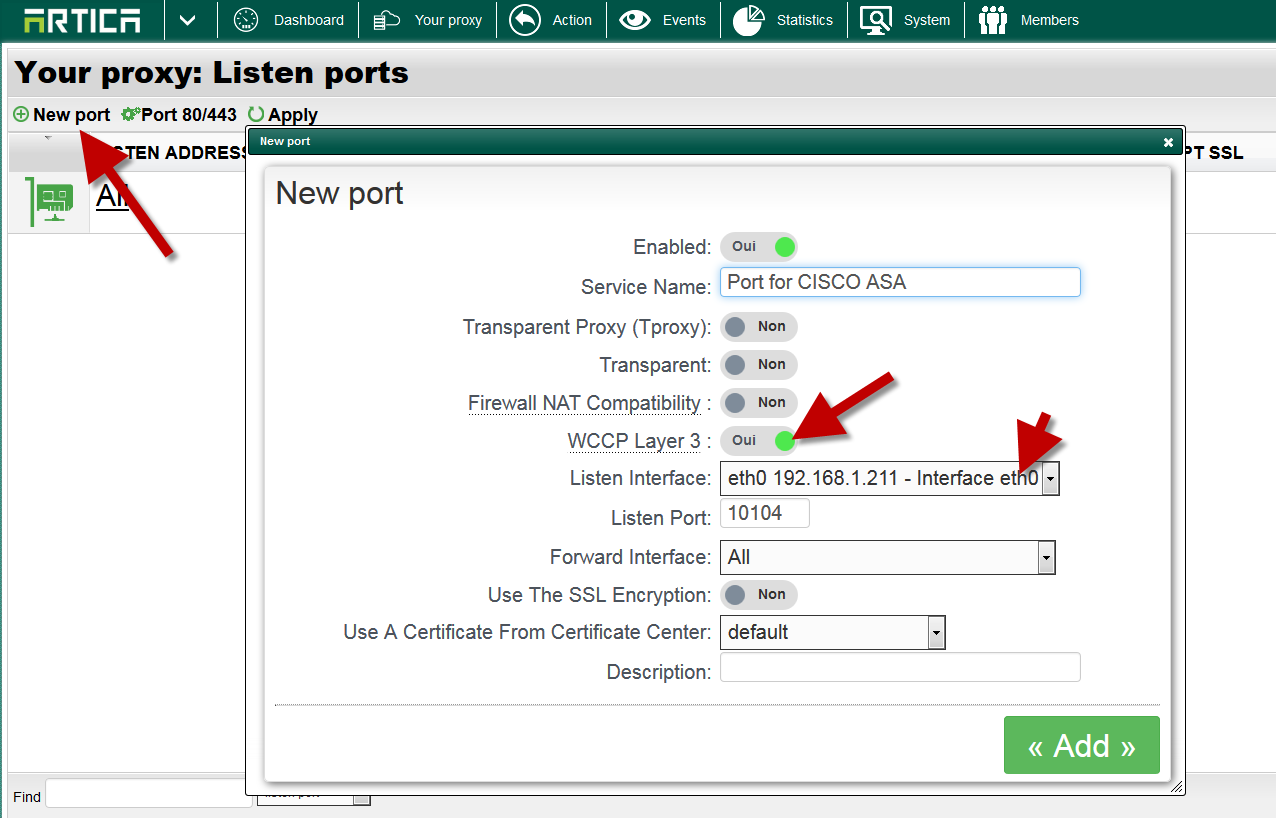
- Click on “New port“
- Enable the WCCP Layer 3 option.
- Select the main network interface that will handle the GRE tunnel.
- Click on Add.
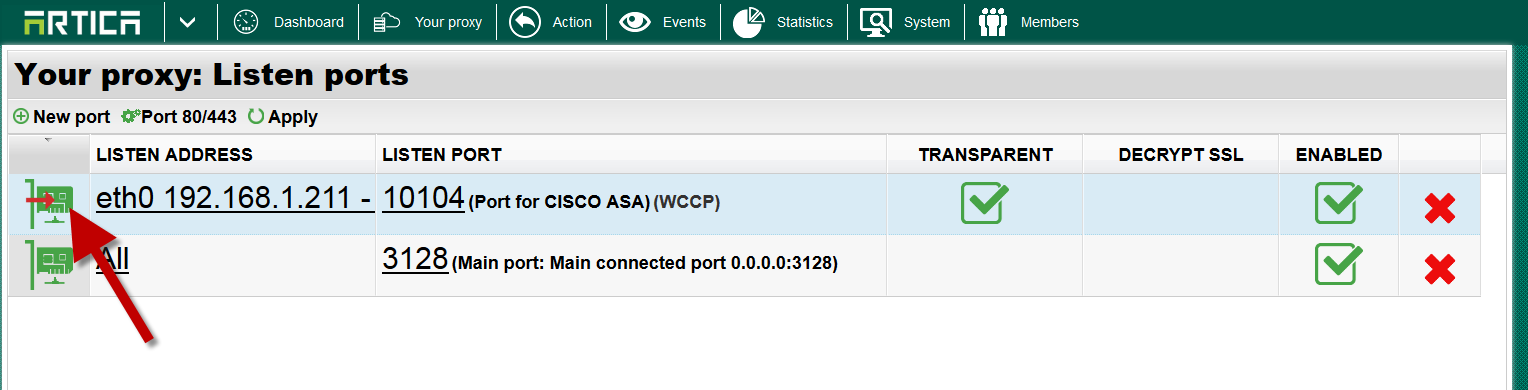
- Select your new port on the main table.
- Choose the Cisco’s Web Cache Coordination Protocol tab
- Set your Fortiget IP address
- If you need to use a specific gateway to access to the Fortiget, define the gateway in the route field.
- The service ID (well-known service id=0 for http and dynamic services (from id 51 to 255)) is used if you need to transfer SSL to the proxy. (we assume that the SSL is enabled in the main port settings)

- Click on Apply to make the port available

- The icon on the table must be green